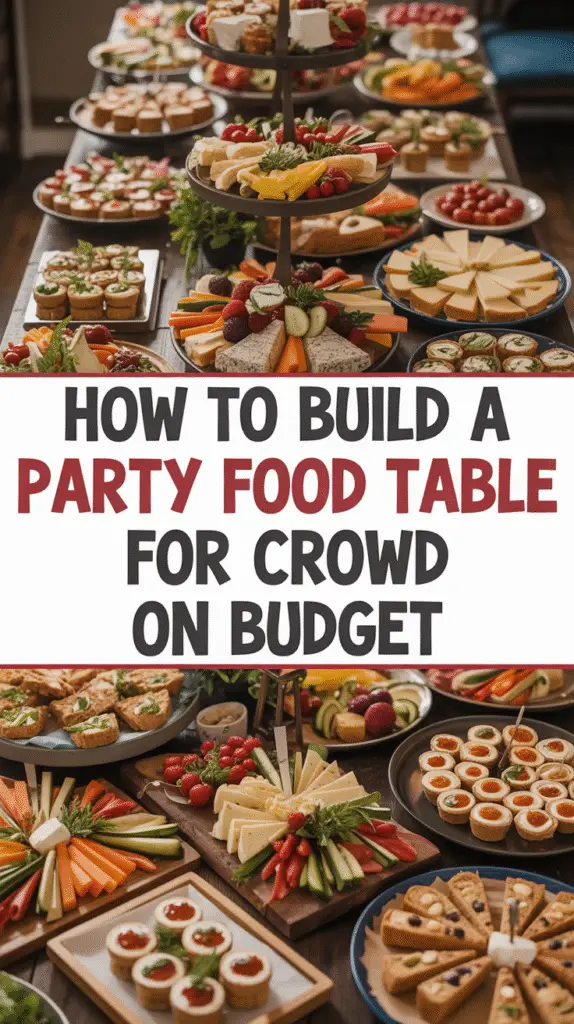
Nothing beats a show-stopping grazing table that feeds a crowd without the stress! Whether you’re planning a birthday party, wedding, baby shower, brunch, or tea party, a DIY grazing table is the ultimate way to impress guests with minimal effort. These easy grazing table ideas are perfect for serving room temperature finger foods, fresh vegetables, desserts, and affordable charcuterie that look gorgeous but won’t break the bank.
Even if you’ve never built one before, you don’t need fancy tools or a catering degree. From stacking crackers, arranging cheeses, and folding meats to styling colorful fruits and desserts, this step-by-step guide to grazing tables shows you how to create a spread that’s both practical and stunning.

Ideal for make-ahead appetizers, budget-friendly party food, and crowd-pleasing bites, these tips will have your friends and family hovering around the table in awe.
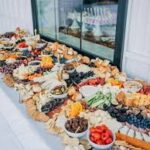
I’ve always had a soft spot for snacks. But not just any snacks—I’m talking about grazing tables. Big, beautiful, slightly chaotic spreads that look like they belong in a magazine but feel approachable enough to eat. There’s something deeply satisfying about unrolling a sheet of butcher paper, layering your favorite foods, and watching it transform into an edible centerpiece that steals the show.
Whether you’re hosting a birthday, bridal shower, church gathering, or just a random Friday night get-together, grazing tables are hands-down the easiest way to feed a crowd without stress, fuss, or Pinterest fails.
Step 1: Step 1: Lay the Foundation for Your Table –Why the right base sets the stage for a beautiful spread
Before you stack a single cracker, you need a foundation. Enter: butcher paper.
Butcher paper is cheap, disposable, and it instantly makes every item on top pop. It adds a casual, intentional vibe that boards or platters can’t quite achieve. If you prefer, you can use a wood serving board for a rustic touch, but I promise—there’s something magical about rolling out butcher paper across the table and setting the stage for your masterpiece.
- Tape the edges underneath to prevent curling.
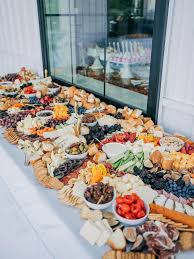
- If you’re outdoors, weigh it down with small platters or bowls until the food arrives.
Now that you’ve got your blank canvas, it’s time to add the anchors—those key pieces that give structure and balance. Think: cheese blocks, small bowls of dips, fruit arrangements. Don’t line them up like soldiers; stagger them diagonally for visual interest. Grazing tables should feel natural, fun, and slightly imperfect.
Add height wherever possible: stack crackers loosely, use small cake stands, or even turn a bowl upside down to lift items. This keeps the table dynamic, instead of a flat, boring spread. A few sprigs of greenery—rosemary, eucalyptus, or even edible flowers—add life, but don’t go overboard. You’re creating a feast, not a forest.
Step 2: Choose Cheeses That Impress
Tips for picking the perfect mix of soft, firm, and bold cheeses
Cheese is the star of a grazing table. But not all cheeses are created equal. You want a balance of flavors and textures: soft, semi-firm, and something bold.
Here’s my go-to selection:
- Soft cheeses: Brie, goat cheese, Camembert—creamy and mild.
- Semi-firm cheeses: Havarti, Manchego, Gouda—easy to slice and pair beautifully with fruit.
- Bold cheeses: Aged cheddar, Parmesan—salty, nutty, and full of flavor.
- Optional blue cheese: A small wedge of Gorgonzola or Roquefort for adventurous palates.
Three to four cheeses is ideal—variety over volume. Always let cheeses come to room temperature before guests arrive; it softens the flavor and makes cutting simple.
Placement tips:
- Start with the cheese—they’re the largest pieces and set the tone.
- Pre-slice wedges or blocks so guests feel confident digging in.
- Add cheese knives, spreaders, or little spoons. A round brie topped with honey or fig jam is both stunning and incredibly tasty.
Step 3: Crackers, Bread, and Crunchy Accents
Crackers may not be glamorous, but they are essential. They give texture, act as a vehicle for cheese and dips, and bring the table together. Mix and match shapes and textures:
- Water crackers for light, crisp bites.
- Multigrain or seeded crackers for extra flavor.
- Toasted baguette slices or crostini for sturdiness.
- Pita chips for dipping.
Keep flavors neutral. Garlic-onion crackers can overpower the delicate balance of your cheeses and spreads. Arrange crackers in piles, leaning against cheese or dips, and don’t stress about perfect symmetry. The slightly messy, abundant look is what makes a grazing table inviting.
Add height with parmesan crisps or pretzel sticks in small jars. Breadsticks work beautifully next to dips or soft cheeses, adding both texture and interest.
Step 4: Add Fresh Fruits and Veggies for Color
This is where the table really comes alive. Bright pops of color make a grazing table irresistible. Think strawberries, grapes, blueberries, cucumbers, baby carrots, apple slices (dipped in lemon water to prevent browning), or dried fruits like apricots and figs.
- Pair fruits strategically: grapes with brie, apple slices with cheddar.
- Arrange veggies near dips: hummus next to carrots, cucumber rounds with soft cheese.
- Add fresh herbs or edible flowers for a polished look.
The goal is visual interest and flavor variety, not perfection. Loose, casual placement makes it approachable and fun.
Step 5: Charcuterie and Protein Extra
Cheese may be the star, but charcuterie is the co-star. It adds richness, saltiness, and a little indulgence. Include:
- Prosciutto folded like ribbons
- Salami rolled or fanned
- Soppressata or peppered turkey slices
- Mixed nuts (almonds, cashews, marcona almonds)
- Olives in small bowls to contain oils
Arrange meats with movement rather than flat rows. Let them curve naturally; it creates a visual rhythm. Include small bowls for pickles, peppers, or other finger-friendly garnishes. Provide toothpicks, mini forks, or spoons for easy grabbing.
Step 6: Sweet Treats That Complete the Table
No grazing table is complete without a few sweet touches. You don’t need a full cake or a mountain of desserts—just a handful of treats that feel indulgent.
- Dark chocolate squares or chocolate-covered almonds
- Yogurt-covered pretzels
- Mini shortbread cookies
- Caramel popcorn
- Honeycomb or drizzled honey on brie
Keep sweets toward the edges to avoid mixing flavors. For brunch, swap in mini muffins or slices of banana bread; for evening parties, chocolate bark or candy works beautifully.
Step 7: Warm and Unexpected Surprises
Here’s a trick many overlook: a warm element. Warm bites add depth and surprise, elevating the table beyond room-temp cheese and fruit.
- Mini baked brie bites in puff pastry
- Tiny cast-iron skillets with roasted garlic for spreading
- Warm pretzel bites in parchment paper
You can even theme your table seasonally:
- Rainy-day grazing table: gray napkins, mushroom pâté, dark chocolate, moody blue cheeses
- Beach-day grazing table: fresh mango, grilled shrimp skewers, coconut chips, lime-dusted cashews
Grazing tables aren’t just about food—they’re storytelling. Each element sets a tone, tells a story, and delights guests in unexpected ways.
The Art of Styling Your Grazing Table
Once you’ve laid out all your cheeses, crackers, fruits, meats, and sweets, it’s time to think like a food stylist. Styling is what transforms a simple snack spread into a grazing table that looks intentional, inviting, and Instagram-worthy.
Play with Height and Layers
One of the easiest ways to add visual interest is to create layers. Use small cake stands, upside-down bowls, or even sturdy boxes hidden under butcher paper to lift certain items off the table. Stack crackers loosely, pile fruit in small mounds, and layer dips in ramekins. Height adds dimension and makes your table feel more abundant without requiring more food.
Embrace Organic Flow
Forget rigid grids or perfectly symmetrical lines. Grazing tables should feel a little messy—but in a beautiful, organic way. Let meats curl, cheese wedges fan out, and grapes spill naturally from their vine. Tiny imperfections make the table approachable and inviting.
Color and Texture Matter
Use a variety of colors and textures to guide the eye and create a feast for the senses. Bright strawberries, green grapes, deep purple figs, and golden crackers all work together to make the table feel lively. Mix soft cheeses with firm crackers, juicy fruit with crunchy nuts, and creamy dips with crisp veggies to create an irresistible contrast.
Add Greenery and Decorative Touches
A few sprigs of rosemary, thyme, or eucalyptus can instantly elevate your table. Edible flowers, small wooden boards, or slate tiles add charm and tie your theme together. The key is subtlety—these elements should enhance the food, not overpower it.
Think About Flow and Accessibility
Place dips near complementary items (hummus next to cucumber rounds, guacamole near chips) and arrange cheese with crackers within reach. Guests should be able to graze freely without knocking anything over. Consider the “flow” from one side of the table to the other, so people naturally move around and try everything.
Create a Story
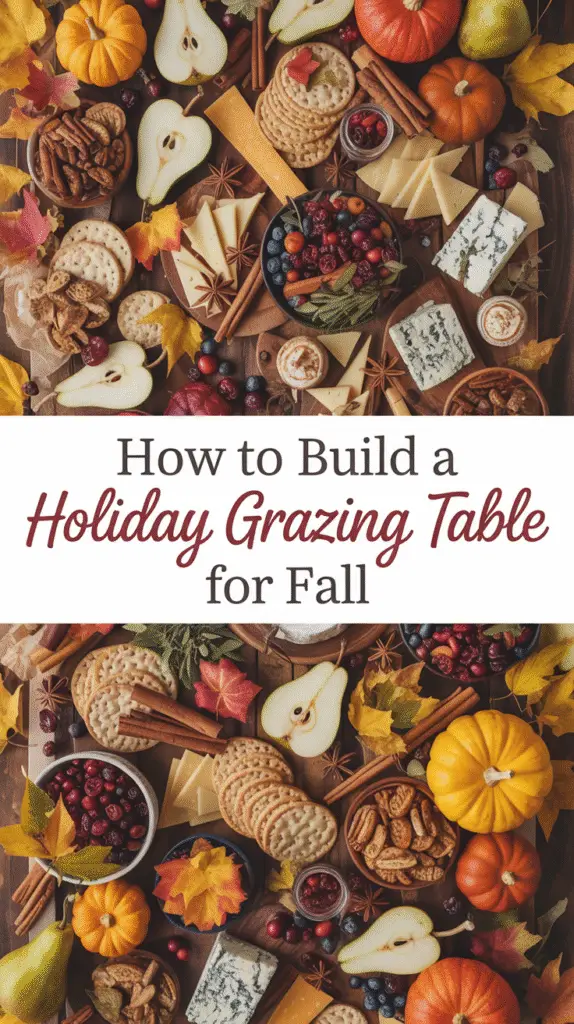
The best grazing tables tell a story—seasonal, thematic, or even emotional. A spring-themed table might include fresh berries, light cheeses, and pastel flowers, while a cozy autumn spread could feature roasted nuts, figs, warm baked brie, and autumnal foliage. Let your table reflect a mood or vibe; it turns snacking into an experience.
Styling your grazing table is where your creativity really shines. With a little thought, a few simple tricks, and an eye for detail, your table will not just feed your guests—it will wow them.
10 budget-friendly grazing table ideas
1. Classic Cheese & Crackers Grazing Table
- Ingredients: A mix of affordable cheeses (cheddar, mozzarella, and cream cheese), assorted crackers, and a few grapes or apple slices.
- Tip: Slice cheese into small cubes or triangles to make it look abundant. Use a wooden board or even a large tray as your base.
2. Mediterranean Grazing Table
- Ingredients: Hummus, pita chips, cucumber rounds, cherry tomatoes, olives, and roasted red peppers.
- Tip: Add a few sprigs of fresh parsley for color. Ramekins for dips make the table look organized and elegant.
3. Veggie Lovers’ Table
- Ingredients: Carrots, celery sticks, cucumber rounds, bell pepper strips, and cherry tomatoes. Add inexpensive ranch or yogurt dip.
- Tip: Stack veggies in small bundles and tie with a thin ribbon or place in small jars for a neat presentation.
4. Fruit-Focused Grazing Table
- Ingredients: Seasonal fruits like apples, oranges, grapes, and strawberries. Include dried fruits like apricots or raisins for variety.
- Tip: Keep fruits on the vine or slice them creatively for a vibrant look.
5. Budget-Friendly Charcuterie Tabl
- Ingredients: Store-brand salami, pepperoni, and a small ham. Pair with inexpensive crackers, pickles, and olives.
- Tip: Roll meats or fold them into shapes to make the table feel plentiful.
6. Sweet & Simple Grazing Table
- Ingredients: Mini muffins, chocolate squares, pretzels, and a few candy pieces.
- Tip: Use small bowls or jars to elevate sweets and keep them organized.
7. Breakfast Grazing Table
- Ingredients: Mini bagels, cream cheese, sliced cucumbers, cherry tomatoes, and boiled eggs.
- Tip: Slice bagels into halves or quarters for easy grabbing and a more abundant look.
8. Popcorn & Snack Table
- Ingredients: Popcorn (plain or lightly salted), pretzels, nuts, and cheese cubes.
- Tip: Use small paper cones or bowls for portioned snacks to create a playful, colorful display.
9. DIY Sandwich Bites Grazing Table
- Ingredients: Mini sandwiches with affordable fillings like ham & cheese, egg salad, or cucumber & cream cheese.
- Tip: Cut sandwiches into triangles or squares for easy grabbing and stack them creatively.
10. Themed Party Grazing Table
- Ingredients: Pick a theme (seasonal or holiday) and use budget-friendly items in matching colors: popcorn, colored chips, seasonal fruits, and simple desserts.
- Tip: Add cheap decorations like fresh herbs, flowers, or colored paper to tie the theme together.
💡 Extra Budget Tip: Use grocery store rotisserie chicken, seasonal produce, and store-brand cheeses to save money. Presentation matters more than expensive ingredients—stack, layer, and use small bowls to make even simple items look luxurious.
Final Thoughts
Grazing tables are about connection, abundance, and joy. They’re casual yet impressive, practical yet indulgent. The slight messiness—the crumbs, the half-eaten wedges, the rogue berries—is all part of the charm.
Most of what you need comes straight from the grocery store. It’s how you arrange it, how you think about color, height, texture, and storytelling that makes your table stand out.
Living in a household with five kids, I’ve learned grazing tables aren’t just beautiful—they’re functional. People remember the experience long after the food is gone. It’s casual hosting with a sprinkle of wow.
And the best part? Everyone will graze and linger, marveling at your creation before it’s devoured. That’s the magic of a grazing table.

Hi, I’m Sabah — the cook behind grillcuisines! I share easy, family-friendly recipes made with love and simple ingredients.