Nothing beats simple picnic snacks you can pull together in minutes—especially when each recipe takes 10 minutes or less! These quick picnic food ideas are perfect for last-minute plans, easy outdoor meals, or impromptu gatherings. From cold picnic food ideas to easy picnic snacks, each recipe is designed to be fuss-free, flavorful, and crowd-pleasing without any complicated prep.
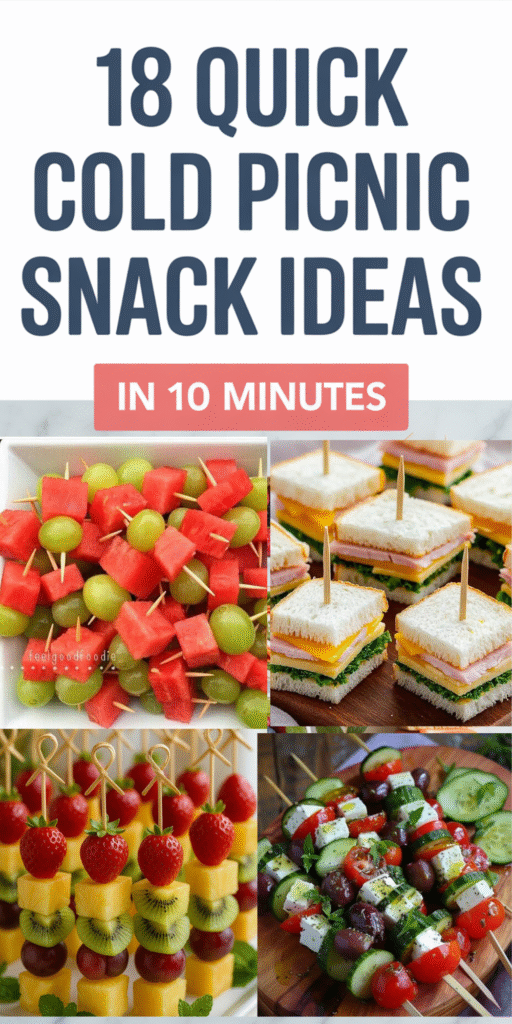
These simple picnic food ideas are great for busy mornings, outdoor adventures, or even a spontaneous lunch in the park. Packed with fresh ingredients and easy assembly, these picnic lunch ideas are not only tasty but also portable, making them perfect for families, friends, or group outings. You’ll love how effortless it is to create cold picnic food ideas that everyone will enjoy.
Perfect for quick bites or full picnic spreads, these easy picnic snacks are designed to satisfy any craving. From finger foods to hearty bites, each recipe delivers flavor and convenience. With these simple picnic food ideas, you can enjoy stress-free outdoor meals without sacrificing taste or variety.
Fruit Skewers
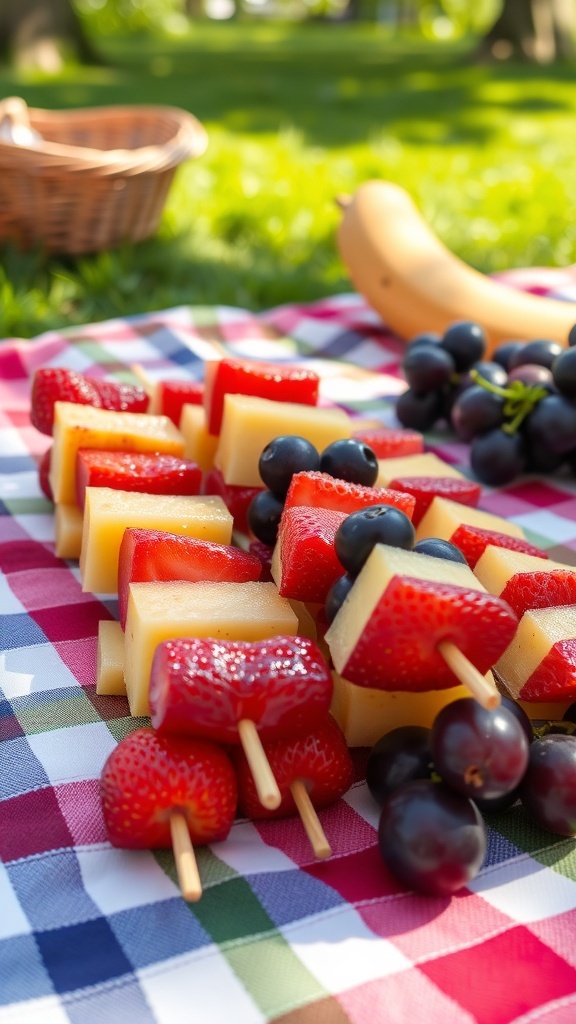
Fruit skewers are a fun and colorful addition to any picnic. They are easy to make and can be customized with your favorite fruits. Just grab some skewers and a variety of fresh fruits, and you’re ready to go!
In the image, you can see vibrant strawberries, juicy grapes, and sweet melon all beautifully arranged on skewers. This not only makes for a tasty snack but also adds a pop of color to your picnic spread. Plus, they are super easy to eat, making them perfect for outdoor gatherings.
To make these fruit skewers, all you need is a selection of your favorite fruits. You can mix and match as you please. The combination of flavors and textures will surely delight everyone at your picnic!
Ingredients
- 1 cup strawberries, hulled
- 1 cup grapes, washed
- 1 cup melon, cubed
- Wooden skewers
Instructions
- Prepare the Fruits: Wash the strawberries and grapes. Hull the strawberries and cut the melon into bite-sized cubes.
- Assemble the Skewers: Take a wooden skewer and start threading the fruits onto it. You can alternate between strawberries, melon, and grapes for a colorful look.
- Serve: Once all the skewers are assembled, place them on a platter or directly on your picnic blanket. Enjoy!
Mini Caprese Bites

Mini Caprese Bites are a delightful and fresh snack perfect for any picnic. These little treats combine the classic flavors of mozzarella, tomatoes, and basil. They’re not just tasty; they also look beautiful on a platter, making them a hit at gatherings.
To make these bites, start with cherry tomatoes. Cut them in half and scoop out a bit of the inside to create a small cup. Then, fill each half with a ball of mozzarella. Top it off with a fresh basil leaf for that aromatic touch. Drizzle some balsamic glaze over the top for added flavor and a touch of elegance.
These bites are quick to assemble and can be made in under ten minutes. They’re light, refreshing, and perfect for warm weather. Plus, they can be prepared ahead of time and stored in the fridge until you’re ready to serve them.
Ingredients
- 1 pint cherry tomatoes
- 8 oz fresh mozzarella balls (bocconcini)
- Fresh basil leaves
- Balsamic glaze
- Salt and pepper to taste
Instructions
- Cut each cherry tomato in half and scoop out a little of the inside to create a small cup.
- Place a mozzarella ball in each tomato half.
- Top with a fresh basil leaf.
- Drizzle balsamic glaze over the assembled bites.
- Season with salt and pepper if desired.
- Serve immediately or chill until ready to enjoy.
Savory Hummus & Veggie Cups
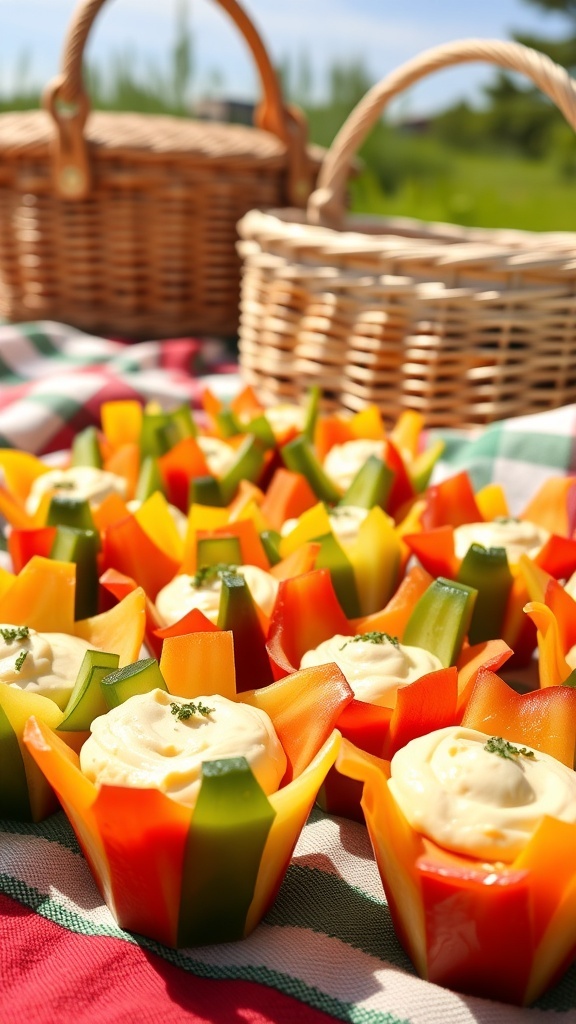
These Savory Hummus & Veggie Cups are perfect for a quick picnic snack. They look colorful and inviting, making them a hit with everyone. The image shows vibrant bell pepper cups filled with creamy hummus, topped with a sprinkle of herbs. It’s a simple yet delightful way to enjoy fresh veggies and dip.
To make these cups, you’ll need just a few ingredients. The bell peppers serve as edible cups, which are not only fun but also healthy. You can fill them with your favorite hummus flavor, whether it’s classic, roasted red pepper, or garlic. This snack is not only quick to prepare but also adds a pop of color to your picnic spread.
These veggie cups are great for sharing and can be made in under 10 minutes. Just chop the peppers, scoop in the hummus, and you’re ready to go. They’re perfect for those last-minute picnic plans!
Ingredients
- 2 large bell peppers (any color)
- 1 cup hummus (store-bought or homemade)
- Fresh herbs (like parsley or cilantro) for garnish
Instructions
- Wash the bell peppers and slice them in half lengthwise. Remove the seeds and membranes.
- Fill each pepper half with hummus, using a spoon or a piping bag for a neat look.
- Sprinkle fresh herbs on top for added flavor and decoration.
- Arrange the filled pepper cups on a platter and serve immediately.
Cheese And Crackers Platter

A cheese and crackers platter is a classic choice for any picnic. It’s simple, quick, and always a crowd-pleaser. Just look at that beautiful spread! You’ve got a variety of cheeses, fresh fruits, and crunchy crackers all arranged on a wooden board. The vibrant colors of strawberries, blueberries, and grapes add a fresh touch, making it not just tasty but visually appealing too.
To create your own cheese and crackers platter, start by selecting a few different types of cheese. Soft cheeses like brie or goat cheese pair well with crispy crackers. Add some sliced fruits for a sweet contrast. Strawberries and blueberries are great options that add a pop of color and flavor.
Don’t forget to include a small bowl of nuts or olives for extra crunch and flavor. This platter is perfect for sharing and can be assembled in just a few minutes. Grab your favorite picnic blanket, and you’re ready to enjoy a lovely day outdoors!
Ingredients
- 1 block of cheddar cheese
- 1 block of brie cheese
- 1 log of goat cheese
- 1 box of assorted crackers
- 1 cup of strawberries, sliced
- 1 cup of blueberries
- 1 cup of grapes
- 1/2 cup of mixed nuts
Instructions
- Prepare the Cheese: Cut the cheddar and brie into bite-sized pieces. Slice the goat cheese into rounds.
- Arrange the Crackers: Place the assorted crackers on the platter, leaving space for the cheese and fruits.
- Add the Fruits: Arrange the sliced strawberries, blueberries, and grapes around the cheese and crackers.
- Include Nuts: Scatter the mixed nuts in a small bowl or directly on the platter for added texture.
- Serve: Grab some napkins and enjoy your cheese and crackers platter outdoors!
Peanut Butter Banana Wraps

Peanut butter banana wraps are a fantastic snack that’s quick to make and perfect for a picnic. Just imagine a sunny day, a cozy blanket, and these delicious wraps ready to be enjoyed. They are not only tasty but also nutritious, making them a great choice for both kids and adults.
To make these wraps, you’ll need some simple ingredients. The combination of peanut butter and banana is a classic that never disappoints. You can also add some strawberries for an extra burst of flavor and color!
These wraps are easy to prepare. Simply spread peanut butter on a tortilla, layer on banana slices, and roll it up. You can slice them into bite-sized pieces for easy snacking. They are portable and can be made in just a few minutes, making them ideal for those last-minute picnic plans.
Ingredients
- 2 large tortillas
- 1/2 cup peanut butter
- 2 bananas, sliced
- 1/2 cup strawberries, sliced (optional)
Instructions
- Spread peanut butter evenly over each tortilla.
- Place banana slices and strawberries on top of the peanut butter.
- Roll the tortillas tightly and slice them into bite-sized pieces.
- Serve immediately or pack them for your picnic!
Chocolate-Dipped Strawberries

Chocolate-dipped strawberries are a delightful treat that can elevate any picnic. These sweet bites are not only visually appealing but also incredibly easy to make. Just imagine juicy strawberries coated in rich chocolate, perfect for sharing or enjoying solo.
To make these tasty snacks, you’ll need fresh strawberries and chocolate. The combination of the sweet, juicy fruit and the smooth, creamy chocolate is simply irresistible. Plus, they can be ready in just a few minutes!
Ingredients
- 1 pound fresh strawberries
- 8 ounces semi-sweet chocolate chips
- 1 tablespoon coconut oil (optional, for smoothness)
Instructions
- Prepare the Strawberries: Wash the strawberries gently and dry them completely. Make sure there’s no water left, as it can cause the chocolate to seize.
- Melt the Chocolate: In a microwave-safe bowl, combine the chocolate chips and coconut oil. Microwave in 30-second intervals, stirring in between, until fully melted and smooth.
- Dip the Strawberries: Hold each strawberry by the stem and dip it into the melted chocolate, coating it about two-thirds of the way up. Let any excess chocolate drip off.
- Set and Chill: Place the dipped strawberries on a parchment-lined baking sheet. Once all are dipped, refrigerate them for about 15 minutes until the chocolate hardens.
- Serve: Enjoy your chocolate-dipped strawberries fresh from the fridge. They’re sure to be a hit at your picnic!
Trail Mix Cups

Trail mix cups are a fun and easy way to enjoy a snack outdoors. Picture colorful silicone cups filled with a delightful mix of nuts, chocolate, and dried fruits. These cups are perfect for a picnic, providing a portable and mess-free option. Just grab a cup, and you’re ready to munch!
Making trail mix cups is super simple. You can customize them with your favorite ingredients. Think about adding almonds, cashews, or even some yogurt-covered raisins for a sweet touch. The vibrant colors of the cups make them visually appealing, adding a cheerful vibe to your picnic spread.
These snacks are not only tasty but also packed with energy. They’re great for keeping everyone fueled during outdoor activities. Plus, they take less than 10 minutes to prepare, making them a perfect last-minute option!
Ingredients
- 1 cup mixed nuts (almonds, cashews, peanuts)
- 1/2 cup chocolate chips (dark or milk)
- 1/2 cup dried fruit (raisins, cranberries, or apricots)
- 1/4 cup seeds (pumpkin or sunflower)
- 1/4 cup granola (optional)
Instructions
- Gather all your ingredients and a set of colorful silicone cups.
- In a large bowl, mix together the nuts, chocolate chips, dried fruit, seeds, and granola.
- Evenly distribute the mixture into the silicone cups.
- Serve immediately or pack them up for your picnic!
Easy Guacamole And Chips
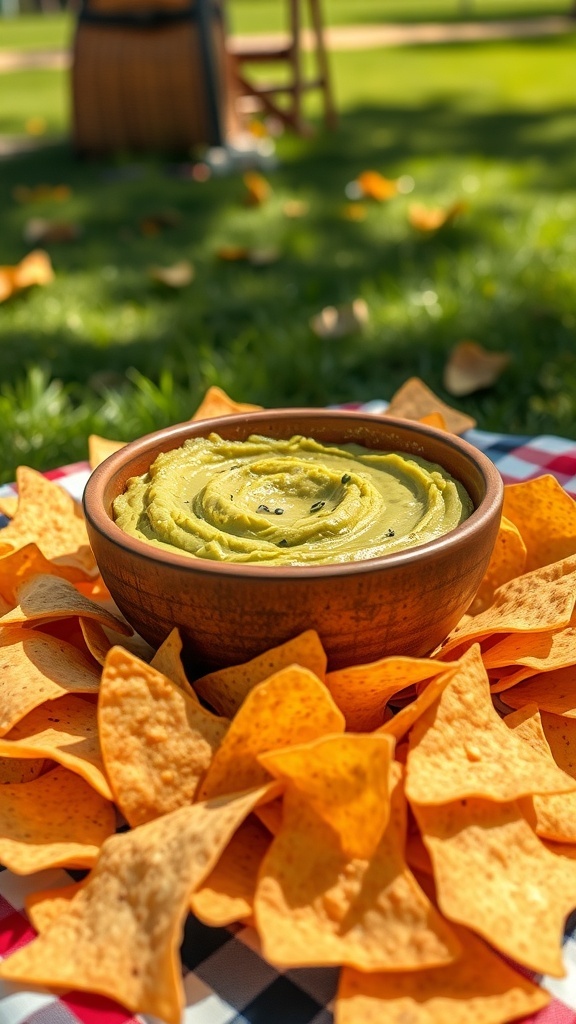
Guacamole and chips are a classic snack that everyone loves. This easy recipe is perfect for a quick picnic. Just look at that creamy guacamole nestled in a bowl, surrounded by crispy chips. It’s colorful and inviting, making it hard to resist!
Making guacamole is super simple. You only need a few ingredients, and it comes together in no time. The fresh avocados create a smooth and rich dip that pairs perfectly with crunchy chips. Whether you’re at the park or in your backyard, this snack is sure to be a hit.
To make your guacamole even more exciting, feel free to add some diced tomatoes, onions, or a squeeze of lime for extra flavor. It’s all about what you enjoy!
Ingredients
- 2 ripe avocados
- 1 lime, juiced
- 1/4 teaspoon salt
- 1/4 teaspoon black pepper
- 1/4 teaspoon garlic powder
- 1/4 cup diced onion (optional)
- 1/4 cup diced tomato (optional)
- Chips for serving
Instructions
- Cut the avocados in half, remove the pit, and scoop the flesh into a bowl.
- Add lime juice, salt, pepper, and garlic powder. Mash everything together with a fork until smooth.
- If using, fold in diced onion and tomato for added texture and flavor.
- Serve immediately with chips and enjoy your quick picnic snack!
Yogurt Parfaits

Yogurt parfaits are a fantastic choice for a quick picnic snack. They are light, refreshing, and packed with flavor. You can layer yogurt with your favorite fruits and granola for a delightful treat. The vibrant colors of the fruits make them visually appealing, too!
To make these parfaits, simply grab a clear glass or cup. Start with a layer of yogurt at the bottom. Then, add a layer of mixed berries like strawberries, blueberries, and raspberries. Top it off with a sprinkle of granola for that satisfying crunch. Repeat the layers until you reach the top of the glass. It’s that easy!
These parfaits are not only quick to prepare but also customizable. You can use any fruits you have on hand, and even switch up the yogurt flavor. They are perfect for enjoying outdoors, especially on a sunny day.
Spicy Popcorn

Spicy popcorn is a fun and easy snack that adds a kick to your picnic. It’s perfect for those sunny days when you want something crunchy and flavorful. The image shows a bowl of popcorn sprinkled with a vibrant red spice, ready to be enjoyed on a picnic blanket. The bright colors and inviting presentation make it hard to resist!
This snack is not only quick to make but also super customizable. You can adjust the spice level to suit your taste. Whether you prefer a mild heat or something more fiery, spicy popcorn is sure to be a hit with everyone.
Ingredients
- 1 bag of microwave popcorn
- 2 tablespoons olive oil or melted butter
- 1 teaspoon chili powder
- 1/2 teaspoon garlic powder
- 1/2 teaspoon paprika
- Salt to taste
Instructions
- Pop the popcorn according to package instructions and place it in a large bowl.
- In a small bowl, mix the olive oil or melted butter with chili powder, garlic powder, paprika, and salt.
- Drizzle the spice mixture over the popcorn while tossing to coat evenly.
- Serve immediately and enjoy your spicy snack!
Energy Bites

Energy bites are a fantastic snack for a picnic. They are easy to make, and you can whip them up in just 10 minutes. These little balls of goodness are packed with nutrients and provide a quick energy boost. Plus, they are super portable, making them perfect for outdoor munching.
In the image, you can see a colorful assortment of energy bites surrounded by fresh fruits and nuts. The vibrant colors make them look inviting and fun. You can easily customize these bites with your favorite ingredients, like nuts, seeds, or dried fruits.
Here’s a simple recipe to make your own energy bites:
Ingredients
- 1 cup rolled oats
- 1/2 cup nut butter (like almond or peanut butter)
- 1/3 cup honey or maple syrup
- 1/2 cup mini chocolate chips or dried fruit
- 1/4 cup chia seeds or flaxseeds
- 1/4 cup shredded coconut (optional)
- 1/2 teaspoon vanilla extract
Instructions
- Mix Ingredients: In a large bowl, combine rolled oats, nut butter, honey, chocolate chips, chia seeds, and vanilla extract. Stir until everything is well mixed.
- Form Bites: Use your hands to roll the mixture into small balls, about 1 inch in diameter.
- Chill: Place the energy bites on a baking sheet and refrigerate for about 30 minutes to firm up.
- Serve: Enjoy them right away or store them in an airtight container in the fridge for up to a week.
Pita Pocket Sandwiches
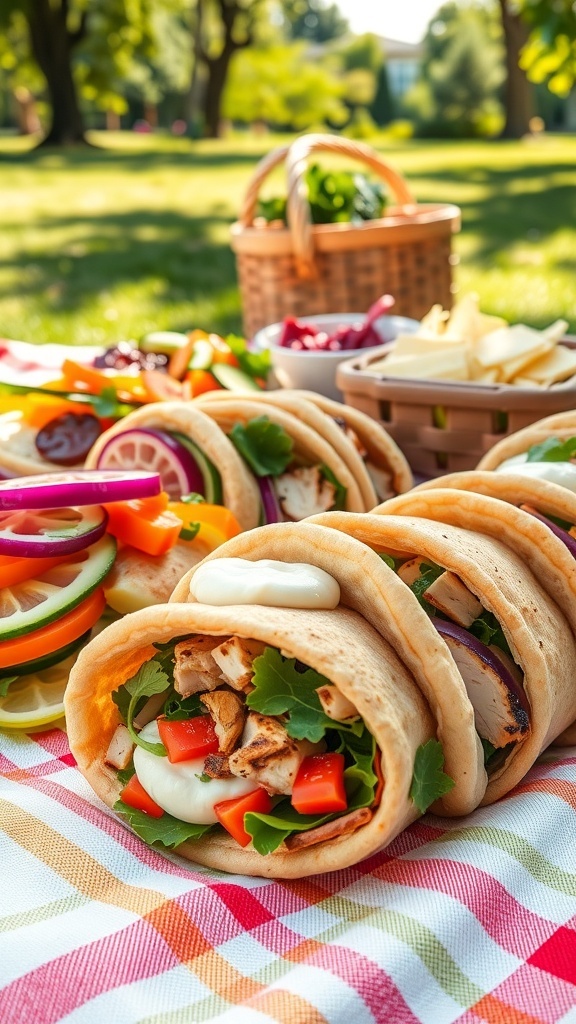
Pita pocket sandwiches are a fantastic choice for a quick picnic snack. They are easy to prepare and can be filled with a variety of delicious ingredients. Just grab some pita bread, and you’re ready to go!
In the image, you can see a colorful spread of pita pockets filled with grilled chicken, fresh greens, and vibrant veggies. The combination of flavors and textures makes each bite satisfying. Plus, they are portable and perfect for enjoying outdoors.
To make these sandwiches, simply fill the pita with your favorite ingredients. You can use grilled chicken, turkey, or even roasted veggies for a vegetarian option. Add some lettuce, tomatoes, cucumbers, and a drizzle of your favorite sauce for extra flavor.
These pita pockets are not only quick to make but also customizable. Everyone can create their own perfect sandwich, making them a hit at any picnic!
Ingredients
- 4 pita breads
- 2 cups cooked chicken, diced
- 1 cup lettuce, chopped
- 1 cup tomatoes, diced
- 1 cup cucumbers, sliced
- 1/2 cup red onion, thinly sliced
- 1/2 cup hummus or yogurt sauce
- Salt and pepper to taste
Instructions
- Prepare the Pita: Cut each pita bread in half to create pockets.
- Fill the Pockets: Start by spreading a layer of hummus or yogurt sauce inside each pita half.
- Add the Chicken: Place diced chicken into the pita, followed by lettuce, tomatoes, cucumbers, and red onion.
- Season: Sprinkle with salt and pepper to taste.
- Serve: Enjoy your pita pocket sandwiches fresh or pack them for your picnic!
Sweet Potato Chips
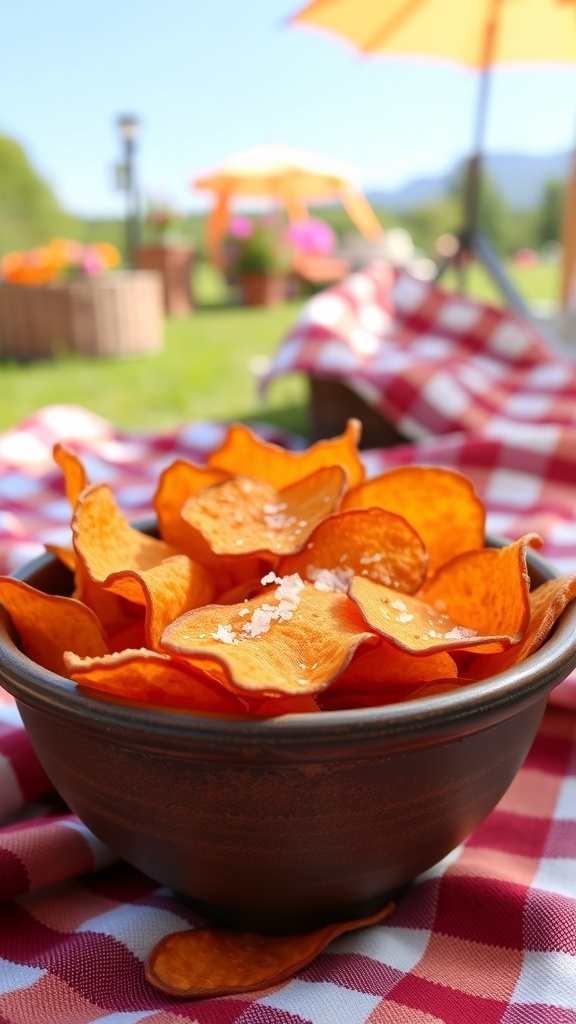
Sweet potato chips are a fantastic snack for your picnic. They are crunchy, slightly sweet, and packed with nutrients. Plus, they are super easy to make! Just slice up some sweet potatoes, toss them with a little oil and salt, and bake until crispy. You can enjoy them plain or pair them with your favorite dip.
These chips are not only tasty but also a healthier alternative to regular potato chips. They add a pop of color to your picnic spread and are sure to impress your friends and family. Grab a bowl and dig in!
Ingredients
- 2 medium sweet potatoes
- 2 tablespoons olive oil
- 1 teaspoon sea salt
- Optional: spices like paprika or garlic powder
Instructions
- Preheat your oven to 400°F (200°C).
- Wash and peel the sweet potatoes. Slice them thinly using a mandoline or a sharp knife.
- In a bowl, toss the sweet potato slices with olive oil and sea salt. Add any optional spices if you like.
- Spread the slices in a single layer on a baking sheet lined with parchment paper.
- Bake for 15-20 minutes, flipping halfway through, until they are golden and crispy.
- Let them cool for a few minutes before serving. Enjoy your homemade sweet potato chips!
Cheese Quesadillas

Cheese quesadillas are a quick and tasty snack perfect for a picnic. They are simple to make and can be customized with your favorite ingredients. Just imagine biting into a warm, cheesy delight while enjoying the outdoors!
To make these quesadillas, you only need a few ingredients. The golden-brown tortillas are filled with melted cheese, making them irresistible. Pair them with some salsa for a zesty kick, and you have a snack that everyone will love.
Here’s how to whip up these delicious cheese quesadillas in no time:
Ingredients
- 4 flour tortillas
- 2 cups shredded cheese (cheddar, mozzarella, or a blend)
- 1 tablespoon olive oil or butter
- Salsa for dipping
- Optional: sliced jalapeños, bell peppers, or onions
Instructions
- Heat a skillet over medium heat and add olive oil or butter.
- Place one tortilla in the skillet and sprinkle half of the cheese evenly over it.
- If using, add any optional ingredients on top of the cheese.
- Top with another tortilla and cook for about 2-3 minutes until the bottom is golden brown.
- Carefully flip the quesadilla and cook for another 2-3 minutes until the other side is golden and the cheese is melted.
- Remove from the skillet and let it cool for a minute before cutting into wedges.
- Serve with salsa on the side for dipping.
Avocado Toast Bites
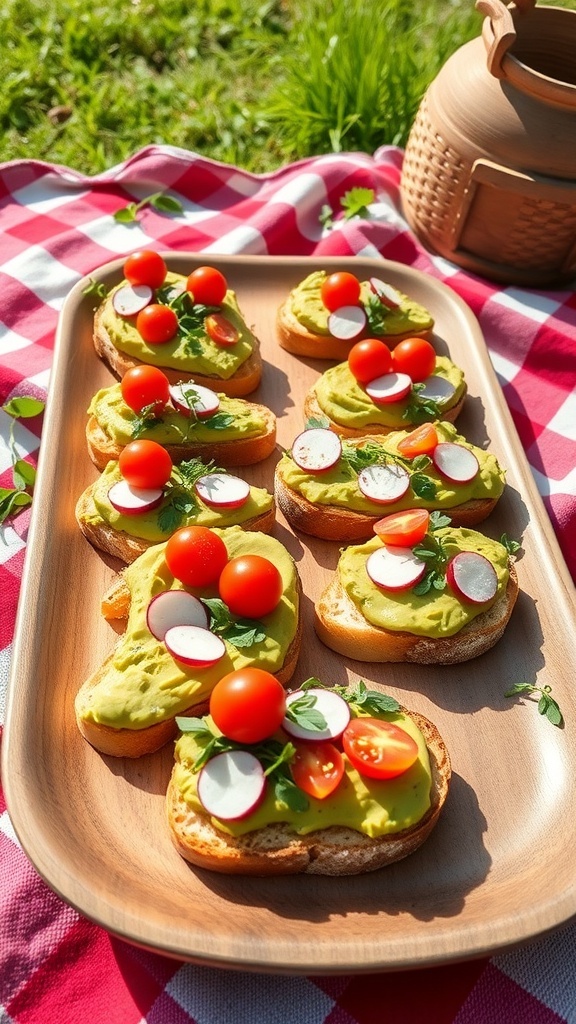
Avocado toast bites are a fantastic option for a quick picnic snack. They’re colorful, tasty, and super easy to make. Just imagine a platter filled with crispy bread topped with creamy avocado, fresh tomatoes, and crunchy radishes. This snack not only looks great but also packs a nutritious punch!
To make these bites, you’ll need some fresh ingredients. Start with your favorite bread, like sourdough or whole grain. Toast it lightly for that perfect crunch. Then, mash ripe avocados with a pinch of salt and a squeeze of lemon juice for flavor. Spread the avocado on the toasted bread and top with halved cherry tomatoes and thinly sliced radishes. A sprinkle of fresh herbs like cilantro or parsley adds a nice touch.
These avocado toast bites are perfect for sharing. They’re easy to grab and eat, making them a hit at any picnic. Plus, you can customize the toppings to suit your taste. Add some feta cheese or a drizzle of balsamic glaze for an extra kick!
Ingredients
- 4 slices of bread (sourdough or whole grain)
- 2 ripe avocados
- 1 tablespoon lemon juice
- 1 cup cherry tomatoes, halved
- 1/2 cup radishes, thinly sliced
- Fresh herbs (cilantro or parsley)
- Salt to taste
Instructions
- Toast the bread slices until golden brown.
- In a bowl, mash the avocados with lemon juice and salt until smooth.
- Spread the avocado mixture evenly over the toasted bread.
- Top with halved cherry tomatoes and sliced radishes.
- Garnish with fresh herbs before serving.
Homemade Salsa With Tortilla Chips
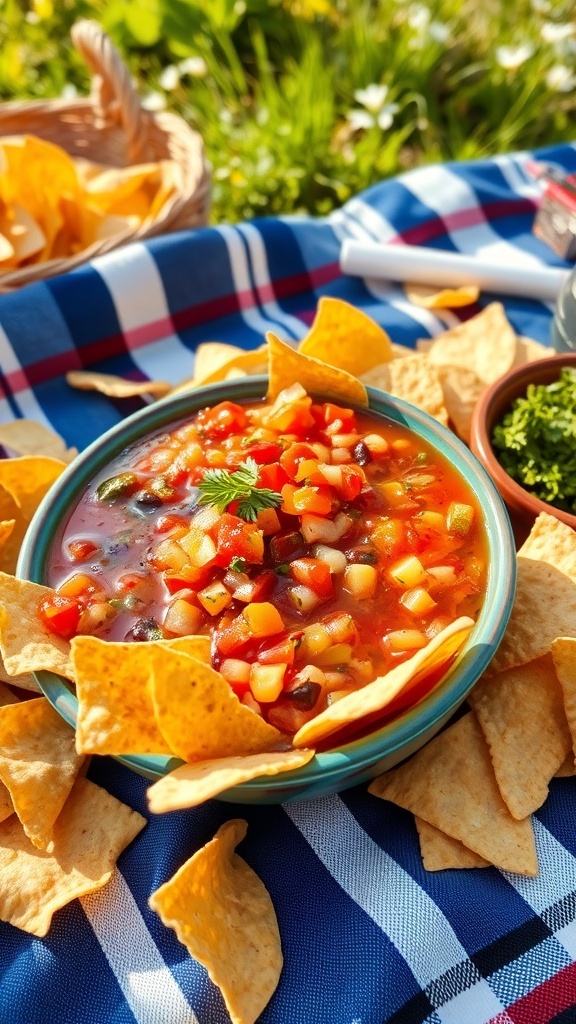
Homemade salsa is a fantastic addition to any picnic. It’s fresh, colorful, and bursting with flavor. Pair it with crispy tortilla chips, and you have a snack that everyone will love. The vibrant colors of the salsa, with diced tomatoes, peppers, and onions, make it visually appealing. Plus, it’s super easy to whip up in just a few minutes!
To make your salsa, you’ll want to gather some fresh ingredients. The key is to use ripe tomatoes, fresh cilantro, and a squeeze of lime juice for that zesty kick. You can customize it by adding jalapeños for heat or corn for sweetness. The tortilla chips add a satisfying crunch, making it a perfect finger food.
This quick snack is not only delicious but also healthy. It’s a great way to enjoy fresh veggies while having fun outdoors. So grab your ingredients, and let’s get started!
Ingredients
- 4 ripe tomatoes, diced
- 1 small onion, finely chopped
- 1 bell pepper, diced
- 1 jalapeño, minced (optional)
- 1/4 cup fresh cilantro, chopped
- Juice of 1 lime
- Salt and pepper to taste
- 1 bag of tortilla chips
Instructions
- In a mixing bowl, combine the diced tomatoes, onion, bell pepper, and jalapeño.
- Add the chopped cilantro and lime juice. Mix well.
- Season with salt and pepper to taste.
- Serve the salsa with tortilla chips on the side.
Cucumber Sandwiches
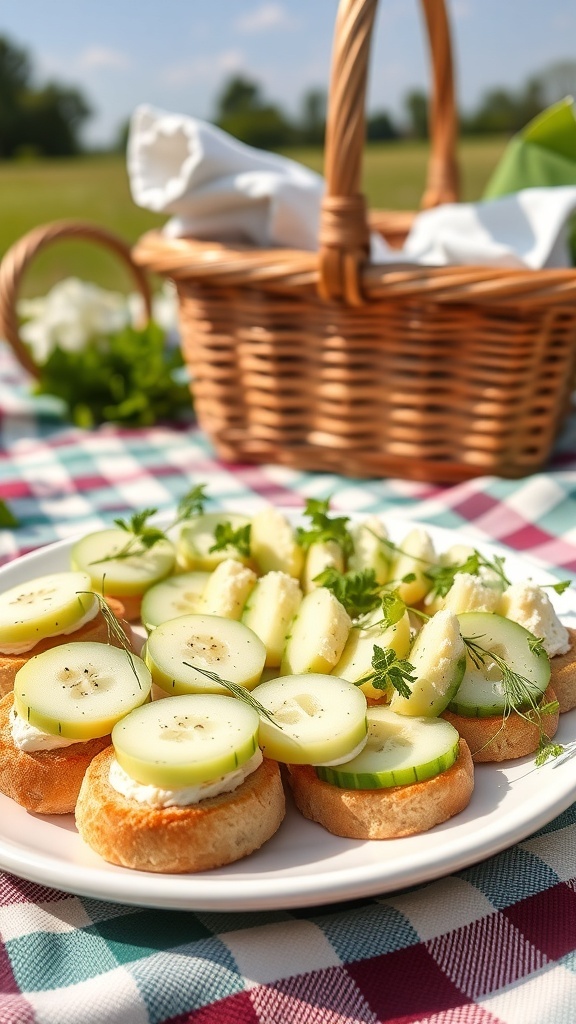
Cucumber sandwiches are a classic picnic treat that are both refreshing and easy to make. They look delightful on a plate, just like in the image, where slices of cucumber sit atop crispy bread. The bright green of the cucumbers contrasts beautifully with the golden-brown bread, making them a feast for the eyes as well as the palate.
These sandwiches are perfect for a quick snack. You can whip them up in no time, making them ideal for those last-minute picnic plans. The combination of creamy spread and crunchy cucumber creates a satisfying bite that everyone will love.
To make your own cucumber sandwiches, you’ll need just a few simple ingredients. They are light, healthy, and packed with flavor. Plus, they can be customized with your favorite spreads or herbs!
Ingredients
- 1 large cucumber
- 8 slices of bread (white, whole grain, or your choice)
- 4 oz cream cheese, softened
- 1 tablespoon fresh dill, chopped (or any herb you prefer)
- Salt and pepper to taste
Instructions
- Prepare the Spread: In a bowl, mix the softened cream cheese with chopped dill, salt, and pepper until well combined.
- Slice the Cucumber: Wash the cucumber and slice it thinly. Aim for even slices for a nice presentation.
- Spread the Cream Cheese: Take a slice of bread and spread a generous amount of the cream cheese mixture on one side.
- Add the Cucumber: Lay the cucumber slices on top of the cream cheese. You can overlap them for a fuller look.
- Top with Another Slice: Place another slice of bread on top to create a sandwich. You can cut them into quarters or halves for easier eating.
- Serve: Arrange the sandwiches on a plate and enjoy your refreshing snack!
Easy Berry Smoothies
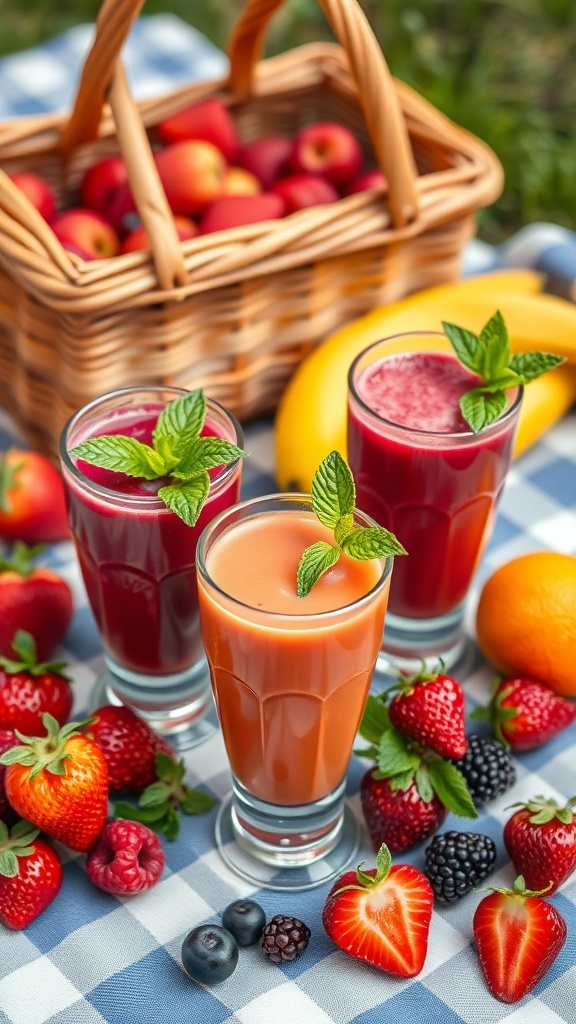
Berry smoothies are a fantastic choice for a quick picnic snack. They’re refreshing, colorful, and packed with nutrients. Just picture a sunny day, a picnic blanket, and a delicious smoothie in hand. You can whip these up in no time, making them perfect for last-minute plans.
To make your berry smoothies, you’ll need a mix of your favorite berries. Strawberries, blueberries, and raspberries work wonderfully together. You can also add a banana for creaminess and a splash of orange juice for a zesty kick. Blend everything until smooth, and you’re ready to go!
Ingredients
- 1 cup strawberries, hulled
- 1 cup blueberries
- 1 cup raspberries
- 1 banana
- 1 cup orange juice
- 1 cup yogurt (optional)
- Fresh mint leaves for garnish
Instructions
- Combine all the berries, banana, and orange juice in a blender.
- If you like it creamy, add yogurt.
- Blend until smooth. If it’s too thick, add a bit more orange juice.
- Pour into glasses and garnish with mint leaves.
- Serve immediately and enjoy your refreshing treat!


Hi, I’m Sabah — the cook behind grillcuisines! I share easy, family-friendly recipes made with love and simple ingredients.