If you’ve ever tried baking gluten-free scones and ended up with dry, crumbly hockey pucks — you’re not alone. I’ve been there, too. Gluten-free baking can feel tricky at first, but once you learn the right balance of ingredients and techniques, you’ll realize that soft, tender scones are absolutely possible.
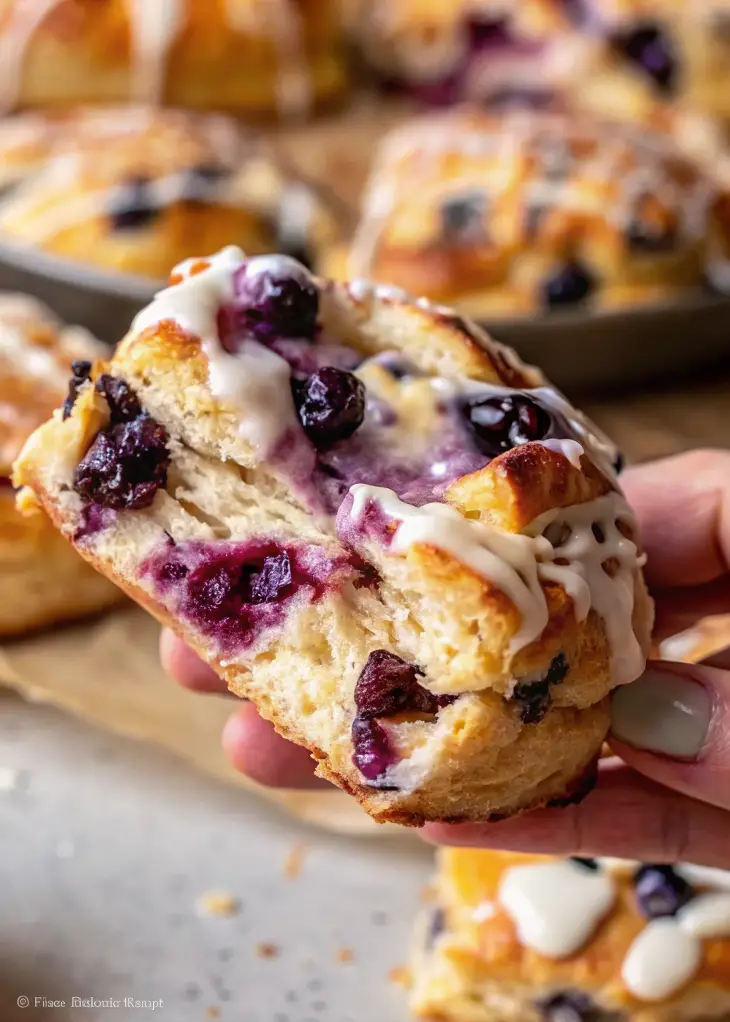
After a lot of trial and error, I finally perfected these Gluten-Free Blueberry Scones — golden on the outside, fluffy on the inside, and bursting with juicy blueberries. They’re every bit as good as classic scones, but made without any gluten (and can easily be made dairy-free, too).

Whether you enjoy them for breakfast, brunch, or an afternoon tea treat, these blueberry scones will make your kitchen smell heavenly and your mornings extra special.
Why You’ll Love These Gluten-Free Blueberry Scones
- Completely gluten-free: Perfect for anyone avoiding gluten or with celiac disease.
- Dairy-free option included: Easily swap ingredients for a 100% dairy-free version.
- Ready in under 45 minutes: Simple steps and minimal prep — ideal for busy mornings.
- Soft, buttery texture: You’d never guess they’re gluten-free!
- Freezer-friendly: Make a batch now and enjoy fresh-baked scones anytime.
Best Gluten-Free Flour for Scones
Not all gluten-free flour blends are created equal. The right mix makes the difference between a dense brick and a tender, bakery-style scone.
Here’s what works best:
- Pillsbury Gluten-Free All-Purpose Flour: My top choice for consistent, fluffy results.
- Bob’s Red Mill 1-to-1 Baking Flour or King Arthur Measure for Measure Flour: Great alternatives that deliver similar texture.
💡 Pro Tip: Check your flour blend’s ingredients — if it already includes xanthan gum, skip adding extra. If it doesn’t, be sure to add some to help bind the dough and mimic the elasticity of gluten.
If you’re new to gluten-free baking, stick with a pre-mixed flour blend instead of making your own. These have been thoroughly tested to perform like traditional flour in recipes like scones, muffins, and cookies.
🧈 Ingredient Substitutions & Variations
This gluten-free recipe is versatile, so you can easily adjust it to your needs. Here are some helpful swaps:
- Flour Blend: Any 1:1 gluten-free flour will work. Pillsbury, Bob’s Red Mill, or King Arthur are the most reliable brands.
- Buttermilk: No buttermilk? Mix ¾ cup milk (or dairy-free milk) with 1 tablespoon lemon juice or white vinegar. Let sit for 5 minutes.
- Blueberries: Fresh or frozen both work beautifully. Keep frozen berries unthawed to prevent color bleeding. You can also try raspberries or blackberries.
- Butter: For dairy-free scones, use Earth Balance, Smart Balance, or solid coconut oil. Keep it cold before mixing.
- Sugar: You can replace white sugar with coconut sugar or raw sugar for a deeper flavor.
- Xanthan Gum: If your flour doesn’t contain it, add ¾ teaspoon. Otherwise, skip.
Common Mistakes to Avoi
- Using warm butter – Cold butter is crucial for that flaky texture. Warm butter melts too soon and makes the dough dense.
- Overmixing the dough – Stir only until everything just comes together. Gluten-free flour can turn gummy if overworked.
- Skipping xanthan gum – It’s the secret to structure and prevents crumbling.
- Overbaking – Keep an eye on them! Gluten-free baked goods can dry out quickly.
- Thawing frozen berries – Add them frozen to prevent streaky, mushy dough.
What to Serve With Blueberry Scones
These scones are lovely on their own but even better with a few simple sides:
- Hot tea or coffee: Earl Grey, English Breakfast, or a latte pair beautifully.
- Fresh fruit: Try strawberries, raspberries, or orange slices.
- Yogurt & honey: For a light, protein-rich breakfast.
- Lemon curd or clotted cream: A classic English touch that enhances the blueberry flavor.
How to Store & Reheat
Room Temperature:
Keep leftover scones in an airtight container lined with paper towels for up to 2 days.
Refrigerate:
Store in an airtight container for up to 5 days. The glaze may soften slightly but still tastes great.
Freeze:
Freeze unglazed scones for up to 3 months. Wrap individually to grab one whenever you want.
To Reheat:
Microwave for 15–20 seconds or bake at 300°F (150°C) for 5 minutes to revive that just-baked texture.
🕒 Recipe Overview
| Prep Time: | 20 minutes |
|---|---|
| Cook Time: | 15–20 minutes |
| Total Time: | 40–45 minutes |
| Difficulty: | Easy |
| Servings: | 8 scones |
🍋 Ingredients
For the Scones:
- 3 cups gluten-free all-purpose flour (Bob’s Red Mill 1-to-1)
- ⅓ cup white sugar
- 2 tbsp gluten-free baking powder
- ¾ tsp xanthan gum (omit if your flour already includes it)
- ½ tsp salt
- ½ cup cold butter (cut into cubes)
- 2 large eggs, beaten
- ¾ cup buttermilk (or dairy-free substitute)
- 1 tbsp lemon zest
- 1 cup blueberries (fresh or frozen)
- 2 tbsp milk (for brushing tops)
For the Glaze:
- 1 cup powdered sugar (sifted)
- 1 tbsp lemon juice
- ½ tsp vanilla extract
- 1 tbsp water (add gradually until desired consistency)
👩🍳 Step-by-Step Instructions
Step 1: Prep the Oven & Ingredients
Preheat your oven to 425°F (220°C). Line a baking sheet with parchment paper.
Dice the butter into small cubes and place it in the freezer for 10 minutes to keep it extra cold.
If you’re making homemade buttermilk, mix your milk with lemon juice or vinegar and let it sit for 5 minutes.
Step 2: Combine Dry Ingredients
In a large bowl, whisk together flour, xanthan gum, baking powder, sugar, salt, and lemon zest.
Mix well to distribute everything evenly.
Step 3: Cut in the Butter
Using a pastry cutter or fork, work the cold butter into the flour mixture until it looks like coarse crumbs or small peas.
This step creates the flaky layers in your scones.
Step 4: Add Wet Ingredient
In a small bowl, whisk together the eggs and buttermilk.
Add this mixture to your dry ingredients and stir gently with a spoon or spatula until a soft, sticky dough forms.
Step 5: Fold in Blueberries
Gently fold the blueberries into the dough.
If using frozen ones, add them straight from the freezer to avoid turning the dough purple.
Step 6: Shape the Doug
Sprinkle a bit of gluten-free flour on parchment paper and place your dough on top.
Lightly dust the top, then fold the dough over itself twice.
Shape it into a round disk about 7 inches wide and 2 inches thick.
Step 7: Cut & Bak
Using a warm knife, cut the dough into 8 wedges.
Place them on your prepared baking sheet, slightly apart.
Brush the tops with milk for a golden finish.
Bake for 15–20 minutes, until the tops are golden brown and firm to the touch.
Step 8: Glaze & Serve
While the scones cool slightly, whisk together the glaze ingredients until smooth.
Drizzle over the warm scones and let it set for 5–10 minutes.
Serve warm with your favorite tea or coffee — perfection!

🧮 Nutrition Estimate (per serving)
(Approximate, without glaze)
- Calories: 230
- Protein: 3 g
- Fat: 9 g
- Carbohydrates: 34 g
✨ Pro Baker Tips
- For extra lift, chill the shaped scone dough for 10 minutes before baking.
- Don’t skip the lemon zest — it brightens the flavor beautifully.
- To make mini scones, divide the dough into two smaller rounds and cut into 6 wedges each.
- You can double the recipe easily for brunch or entertaining.
💭 Final Thoughts
These Gluten-Free Blueberry Scones are proof that gluten-free baking doesn’t mean sacrificing taste or texture. They’re light, buttery, slightly crisp on the edges, and bursting with blueberries.
Perfect for brunch, tea time, or a cozy weekend breakfast, they also make wonderful gifts when wrapped in parchment and tied with ribbon.
Once you try these, you’ll never go back to store-bought scones again — and no one will even guess they’re gluten-free!